
Here is a simple and affordable DIY tutorial that anyone can do!
For this tutorial I will be framing a 4" x 6" inch Print.
Here are the materials you will need:

1. 11" x 14" or larger sized ready-made frame with 5" x 7" mat opening. (Mat should be acid-free).
2. Acid-Free Mat board for mounting work if not included with Frame.
3. Exacto or utility knife4. Gummed Linen Hinging Tape (Acid-Free)
5. Ruler or straight-edge.
6. Pencil.
7. Scissors.
8. Cardboard or cutting mat to protect cutting surface.
If the ready-made 11" x 14" frame does not include a mounting board, then cut a piece of mat board to the same size with a utility knife and a ruler. Remember to protect the cutting surface.

STEP: 2
Then take the acid-free mat board and place it facing up on top of the mounting board.

STEP 3:
Take your 4" x 6" inch print or photograph and center in inside the 5" x 7" mat opening like so.

STEP 4:
With a pencil lightly mark the top left and top right corners on the mounting board.

STEP 5:
Place the mat board in a safe area for now. Then take the 4" x 6" image and turn it upside down facing you and align along the pencil marks so it is straight and parallel to the top and bottom of the mounting board.
Then flip the image so the backside is facing you.
Then flip the image so the backside is facing you.

STEP 6:
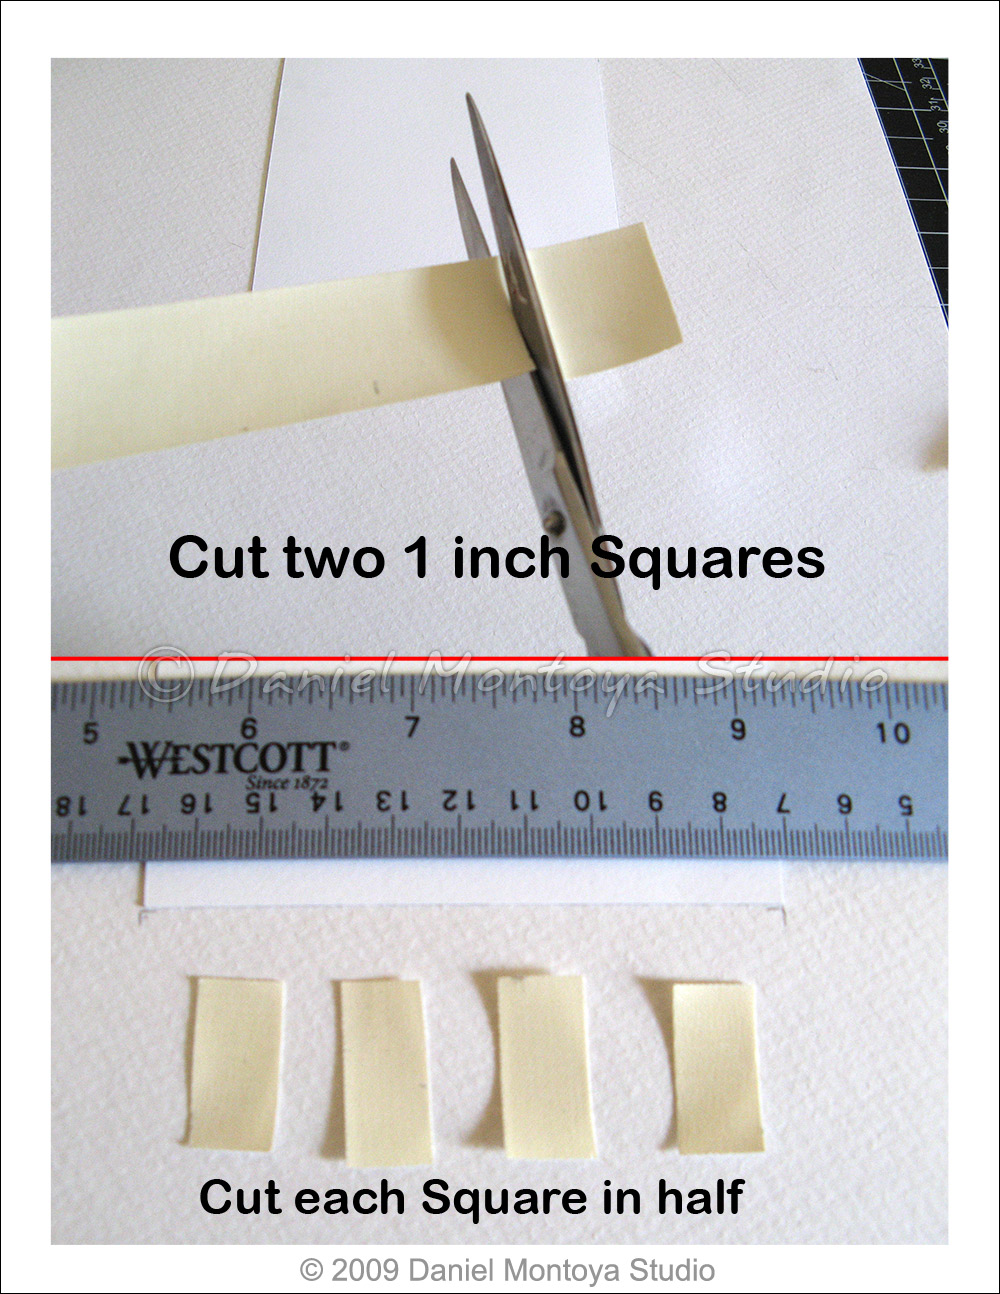
Cut a 6 inch piece of Gummed Linen Hinging Tape and measure two 1" inch marks on the backside with the pencil.

STEP 7:
Cut along the pencil marks to get two 1" inch Squares of tape. Then, with scissors cut each of the squares in half so you have 4 pieces of tape.
STEP 8:
Apply a little water to the gummed side of the linen tape and wait until it gets sticky. Then apply two pieces vertically 1/2 inch from the corners of the image, about 1/3 of the tape on the image and the rest on the mounting board. This attaches the image to the mounting board.
Then to reinforce the hinge apply the other two pieces of tape horizontally across the vertical pieces aligned with the edge of the image.
This creates a 2 standard T-Hinges, but since this hinge will be invisible when the image is folded over it is known as a V-Hinge.

STEP 9:
Erase any visible pencil marks with a kneaded eraser and then flip the image towards you and fold over the V-hinges.

STEP 10:
Image is shown V-hinged to the mounting board.

STEP 11:
Then flip the mat board on its backside and place it adjacent to the mounting board like so. Cut the remaining gummed linen tape in 2 pieces and attach the mat board to the mounting board creating a hinge. 
STEP 12:
Fold the mat board over on top of the mounting board. Your work is ready to be inserted into the frame!

STEP 13:
Before you insert the mat board into the frame make sure that the glass is smudge and debris free. Clean the glass with a damp cloth and a little Windex and let it dry for a few minutes. Then place inside the frame and hang. Voila! That wasn't too bad.

I like this method of framing work because you can use affordable ready-made-frames and it allows the edges of the work to show.
This is useful if you have a work with small margins or you don't want a portion of the image to be hidden behind a traditional beveled mat. It also allows you to display work without the need to own a professional mat cutter to make beveled mats.
[If you want to use the traditional method which hides the T-Hinge behind the mat board, just follow the steps to create a T-Hinge, but don't turn and flip the image upside down in STEP 5. ]
ABOUT GUMMED LINEN HINGING TAPE:
Gummed linen hinging tape is a safe, water reversible, acid-free tape with a water activated adhesive. The adhesive dries strong and will not warp.
This is the gummed tape I used for this tutorial.
Your local Arts & Craft Store, Photography Stores, or Office Supply Store might carry this item.
I hope that helps. If you have any other questions don't hesitate to ask. I hope you have enjoyed this tutorial and you find it helpful. Thanks for visiting!


Thanks. This is how I was taught but I fight a constant battle with people who stick work in a frame with no mats and the glass sitting on the art. I'm always giving lectures ...
ReplyDeleteInteresante...
ReplyDeleteWow! Is it sooo easy?
ReplyDeleteWow! Thanks for sharing this info. Very thorough!
ReplyDeleteexcellent how to post. thanks for sharing :)
ReplyDeleteShona Cole